Window Problems That May Signal Water Intrusion or Failed Seals
Window water stains, peeling finishes, soft trim, fogged glass, drafts, and damaged seals can point to moisture entry or failed insulating glass. HomeRemodelSammamish.com checks the window, frame, trim, and surrounding wall to determine whether repair or replacement fits the damage.
Request an EstimateWhich Window Problems Need Prompt Attention?
Window problems need prompt attention when moisture, soft materials, visible decay, or repeated fogging show that damage may be spreading.
Water intrusion can move from the window opening into the trim, drywall, or insulation. A failed window seal may also reduce glass performance without causing a visible leak.
We check the window frame, window trim, sill, flashing, and nearby wall. That inspection helps separate a surface issue from deeper moisture damage.
Use This Guide to Separate Surface Issues From Replacement Problems
Window symptoms can come from a small finish defect, a failed seal, or a damaged installation area. The table shows what each sign may mean and what we check next.
| Visible sign | Possible cause | Likely next step |
|---|---|---|
| Water-stained trim | Window leak, failed flashing, or a caulk joint | Trace the moisture source before painting |
| Soft wood or swollen sill | Long-term moisture damage | Inspect the trim, frame, and wall opening |
| Fogged glass | Failed insulating glass seal | Assess glass replacement and frame condition |
| Draft near the sash | Worn weatherstripping or frame gaps | Test air leakage and inspect the window seal |
| Damage around the opening | Water entry at flashing or the rough opening | Define repair scope before choosing replacement |
Mistake 1: Treating Water Stains Around the Trim as Paint Damage
Why water stains need more than paint
Water stains around window casing often show that moisture reached the interior trim. Paint can hide the mark, but it cannot stop the moisture source.
We inspect the interior trim, flashing, exterior sealant, and nearby siding. Repair cost drivers include the source of the leak, damaged materials, finish work, and access.
Our fix starts with the water path. We then define the repair scope, replace damaged trim when needed, and restore the finish after the area is dry.
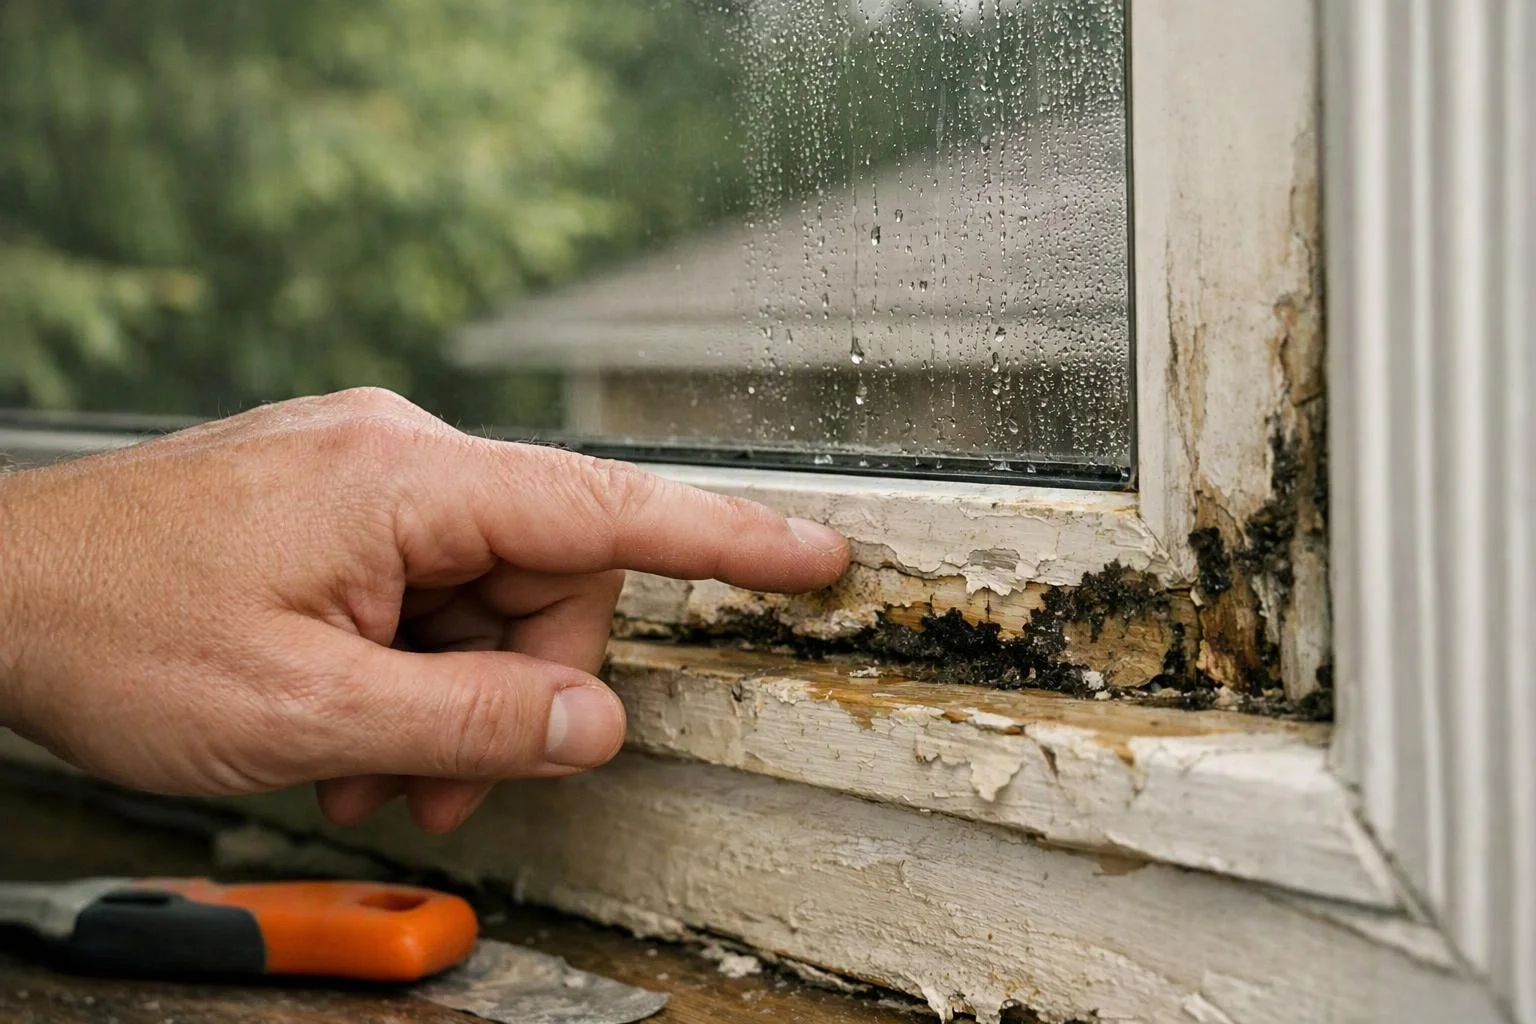
Mistake 2: Ignoring Soft, Swollen, or Rotting Window Trim
Why damaged wood changes the repair
Soft wood around a window sill or trim can signal ongoing wall moisture. Swollen trim and wood rot may also show that water has stayed in the assembly.
We check the sill, frame edges, wall surface, and nearby insulation. The repair scope depends on how far the moisture damage extends.
Our crew removes unsound material, corrects the moisture source, and restores the affected finish. A damaged frame or opening may require broader window work.
Mistake 3: Assuming Fogged Glass Is Only a Cleaning Problem
What fogged glass can mean?
Fogged glass often means the insulating glass unit has lost its seal. Condensation between panes forms inside the sealed space, so surface cleaning cannot remove it.
We inspect the failed insulating glass seal and the surrounding frame. Glass replacement may solve the issue when the frame remains sound.
Window replacement makes more sense when the frame, sash, or installation area also has damage. We explain the difference before defining the work.
Mistake 4: Painting Over Peeling or Bubbling Window Finishes
Why finishes fail
Peeling paint and a bubbling finish can show moisture behind the coating. The moisture may come from a leak, poor drainage, or vapor moving through the assembly.
We inspect the window frame and finish after checking for underlying water damage. Surface repair alone may fail when wet material remains below the coating.
Our repair removes loose material, addresses the moisture source, and restores the affected surface. The final scope depends on frame condition and finish damage.
Mistake 5: Blaming Every Draft on the Weather
How drafts point to air leakage
Window drafts can come from worn weatherstripping, sash movement, frame gaps, or a failed seal. Cold weather may make the problem easier to notice, but it does not identify the cause.
We check the sash, frame joints, weatherstripping, and nearby trim. Air leakage can exist without visible water damage, but gaps can also allow moisture into the assembly.
Our repair may focus on the seal, weatherstripping, or frame. Replacement becomes relevant when the window cannot close or seal reliably.
Mistake 6: Sealing the Interior Without Checking the Exterior
Why the exterior controls the water path
Exterior window sealant helps close joints, but caulk cannot correct every flashing or drainage problem. Water may enter where the window meets the siding or wall.
We inspect caulk joints, flashing, the siding interface, and the drainage path. This process helps connect the interior symptom to the exterior water entry point.
Our fix addresses the failed joint or installation detail. We avoid sealing over a path that still needs to drain.
Mistake 7: Waiting After Water Appears During Rain
Why an active leak needs inspection
An active window leak can move rainwater into the interior wall, drywall, or insulation. Waiting can make the affected repair scope larger.
We document the visible water, inspect the window assembly, and trace the likely entry path. A moisture inspection helps identify damage that a dry surface may not show.
Our repair plan may include drying, trim work, wall repair, flashing correction, or window replacement. The work depends on the source and extent of damage.
Mistake 8: Replacing Glass When the Frame or Wall Is Damaged
When glass is not the whole problem
Window glass may be replaceable when the frame remains stable and the rough opening is dry. Glass alone will not correct damaged wall framing or structural moisture damage.
We inspect the frame, rough opening, wall framing, sill, and flashing. Those conditions guide the replacement decision.
Full window replacement may be needed when the frame or installation area cannot be restored reliably. We include related trim and wall work in the defined scope.
Mistake 9: Replacing the Window Before Finding the Water Path
Why root-cause inspection comes first
Water path tracing shows whether moisture comes through the window, siding, flashing, or a roof-to-wall intersection. A new window cannot solve water that enters somewhere else.
We review the exterior surface, flashing, window installation, and rough opening. We also check nearby finishes for signs that the path extends beyond the window.
Our root-cause inspection shapes the repair scope. It helps prevent repeated leaks after window work is complete.
When Should a Leaking Window Be Replaced?
A leaking window should be considered for replacement when the frame, insulating glass, or installation area cannot be restored reliably through a limited repair.
We weigh repair feasibility against the condition of the full assembly. Our Window Replacement service can include the frame, flashing, trim, and related wall work when the scope requires it.
What We Check Before Recommending Window Replacement
Window inspection starts with the glass seal, frame, trim, and sill. We then review flashing, the interior wall, and the surrounding installation area.
We look for water paths, soft materials, failed caulk joints, and air leakage. We also check whether the window operates and seals as intended.
Our replacement scope identifies the window unit, frame work, flashing, trim, wall repair, and finish work. That detail makes the repair decision easier to understand.
What Changes the Cost of Fixing Water-Damaged Windows?
Window repair or replacement cost depends on the window type, frame damage, glass condition, surrounding moisture damage, access, and finish work. We review those conditions and provide a quote for the defined scope.
Window size, frame material, glass package, trim replacement, flashing repair, and wall repair can each change the work involved. Labor access also matters when the opening is difficult to reach or protect.
Our quote separates the window work from related trim, flashing, wall, and finish work. We offer Free Consultations to discuss the conditions and next step.
Call HomeRemodelSammamish.com When These Warning Signs Appear
These warning signs show when a window issue needs our inspection and repair planning.
We assess the water path before recommending a repair or replacement. That approach helps keep the work focused on the actual source.
How to Plan the Next Step After a Window Leak
A window leak needs clear documentation, a moisture inspection, and a defined repair decision.
We can help define the next step for a leaking or water-damaged window. Contact us through our contact page to discuss the inspection and Window Replacement service.
Questions About Window Leaks and Failed Seals
Can a damaged window seal lead to water intrusion?
Yes, a damaged window seal can allow water intrusion when the seal is part of the failed drainage or installation path. We inspect the glass seal, frame, flashing, and surrounding wall to identify the source.
What causes water stains around window trim?
Water stains around window trim can come from failed flashing, exterior sealant, siding joints, or a leaking window installation. We trace the moisture path before repairing the stain or replacing the trim.
Can condensation between window panes be repaired?
Condensation between window panes usually means the insulating glass seal has failed. Glass replacement may work when the frame is sound, while a damaged frame may call for window replacement.
Is a drafty window always a sign of water damage?
No, a drafty window can result from worn weatherstripping, sash movement, or frame gaps without visible water damage. We check for air leakage and also inspect nearby materials for hidden moisture.